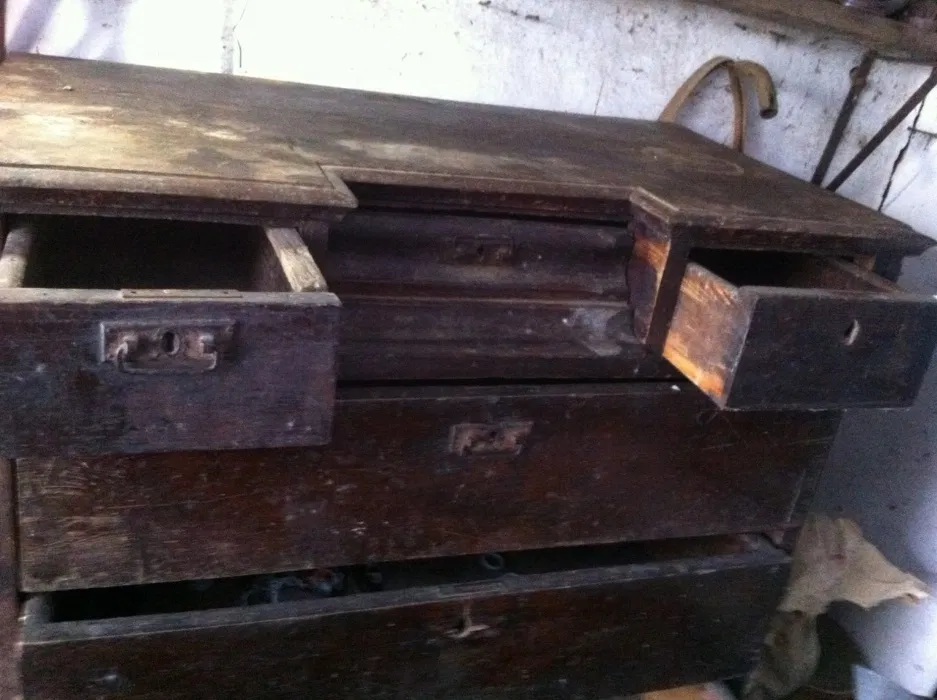
There’s a common belief that items made 20–30 years ago last much longer than those made today. This applies to everything—from cars to furniture. Whether that’s true or not, we won’t claim for certain, but there’s no doubt that older items were built very reliably. We were reminded of this when we came across an old dresser—over 50 years old according to the faded label—found by chance in an abandoned shed. Although it was still quite solid, it definitely needed restoration.
At first, we thought about simply throwing the old dresser away. But after a closer inspection, we decided to try restoring it—especially since the drawers were in decent shape, with some even opening without issue.


RESTORING A DRESSER BY HAND
So, the restoration project began! First, we thoroughly washed the dresser with a high-pressure washer, removing dirt, dust, and mold from the walls and drawers.
However, it turned out that washing the sides wasn’t necessary—the force of the water caused them to fall apart. So once the dresser dried, we removed the drawers, dismantled the side and back panels, the bottom, and the tabletop.
The frame of the dresser was made from fairly sturdy boards, although some were damaged by woodworms. We filled the insect holes, dents, and rough spots with wood filler.
Next, we carefully sanded the frame with a power sander on all sides.
At the same time, we worked on restoring the drawers. They were cleaned, dried, and painted with acrylic paint.
We reused the original old metal handles, still bearing traces of rust. Such handles are nearly impossible to find today. After lightly sanding them with fine sandpaper, we also gave them a fresh coat of paint.


We then applied stencils to the drawer fronts, using a contrasting shade of paint.
To replace the destroyed side panels, we bought 4 mm thick plywood. After measuring the dimensions, we used a circular saw to cut the plywood into the needed parts.
The side panels were attached to the frame with small finish nails. To enhance the look, we framed the edges with decorative molding, cutting the corners at 45 degrees.
Next, we nailed the tabletop back in place and sanded it thoroughly until smooth.
For the bottom of the dresser, we used 10 mm thick plywood, assembling it from three pieces since a single large piece wasn’t available. The plywood was secured with screws into wooden strips that we had previously attached along the lower perimeter of the frame.
We then tested fitting a large drawer—it looked quite good!
Unfortunately, the bottom drawer had been completely destroyed. So instead of replacing it with another drawer, we decided to install a door.
We measured the opening, transferred the dimensions onto a 25 mm thick board, and cut it with a circular saw.
The board was sanded thoroughly, and the edges were finished with decorative molding we had salvaged from the original dresser.
To attach the door to the dresser, we needed to install surface-mounted hinges.


To do this, we cut recesses on the inner side of the door. We attached a metal hole saw to a drill and carefully removed excess wood.
Before installation, we painted the door in the chosen color.
It was important to drill carefully so as not to drill through the board completely. We worked slowly, using a narrow chisel to fine-tune the recesses.
Finally, we attached the hinges to the door with short screws.
To prevent the door from pushing inward, we mounted a small wooden block on each side of the opening.
We clamped the door in place with clamps and attached the hinges to the base of the dresser (since the back panel was not yet installed).
The lower shelf was now ready. We then attached decorative handles and applied a stencil to the door front, creating a surprising new space—perfect for storing shoes!
It was time to install the back panel. We screwed it into place.
Next, we painted the entire dresser with acrylic paint.
Once the paint dried, we applied acrylic lacquer over all the elements to protect the surfaces from wear.
Finally, we reinstalled the drawers—and just like that, the old dresser looked brand new!
To make the drawers slide even more smoothly, we followed an old trick: rubbing candle wax onto the runners.
As it turns out, the old dresser was indeed built with great craftsmanship. And now, after a bit of restoration, it will serve us well for many more years.
Subscribe to our YouTube channel for more projects like this!
If you enjoyed this article, feel free to share it on social media.


